Sequencer
Contents
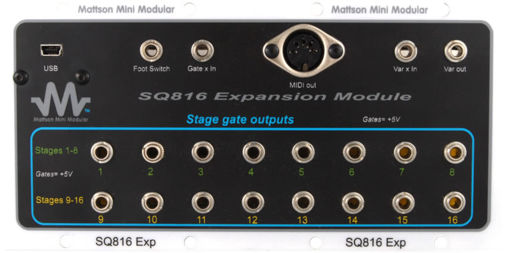
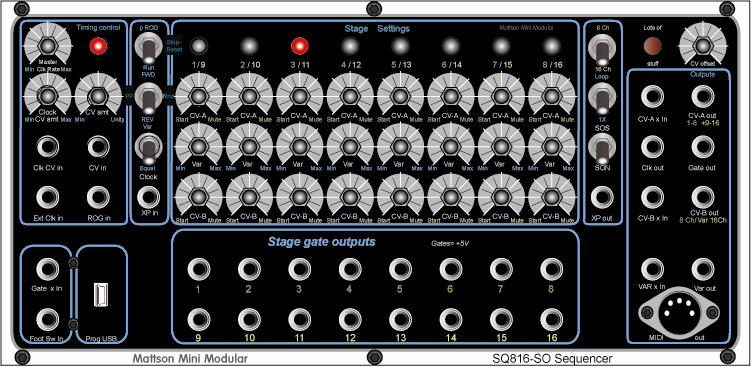
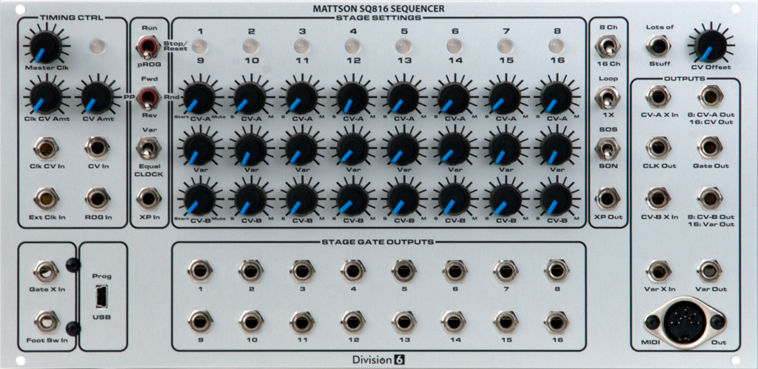
Model SQ816
Features
There are four products derived from this joint endeavor between Mattson Mini Modular and Division 6:
1: The revised MMM format 3-wide main sequencer
2: A 2-wide Sequencer expansion module
3: A combined stand-alone unit housed in a (to be determined) case with a power entry
4: A stand-alone version in a 52HP Euro format manufactured and available from Division 6.
(Same size and layout as the 'stand-alone' panel.)
The SQ816 is an advanced-level analog step sequencer and provides the following features:
Can use any power scheme from +/- 8V to +/- 15V. The only difference is the main gate output level will be 1V less than the supply and the clock rate increases with lower supplied voltage and will need to be recalibrated..
Plugged the power in backward on the main board? No problem. The system figures it out and gets what it needs. No dead system, no blown parts.
Rows 1 and 3 can be daisy chained to provide 16-channel sequencing. During 16 channel operation, the rows 1 and 3 are generated from the CV A output. Row 2 Var CV's are then routed out of the CV B output.
A user tap-tempo mode that overrides the internal VC or external Clocks providing both timing and gate-length.
Global and Individual stage 0/+1 octave shift.
Three user-selectable gate length outputs: Short, follow(the clock duty cycle) and long.
CV output bank A and/or CV output bank B quantized/linear output selection (1V/O format)
Enabling quantize on a bank switches on the MIDI output for that bank.
I/O re-design to allow for easy daisy-chaining of multiple systems.
Run-on-Gate (ROG) input added to allow for sequencer stage advance only during a gate applied to the input.
Pause, Including Gate (PIG) operation in Run Mode.
Ping-Pong and random modes added to directional options. Switching back to Ping-Pong from Random re-enters at the same point and direction that it left at.
Catching the stage advance in Ping Pong mode between two start points will program the two points. This constrains random operation between the points while in Loop mode but allows all stages to play when switched to 1X mode. Stages are restricted between the start points again when switched back to Loop mode.
With the region defined between two start points, An XP in gate will start the sequence within the region, run through and enter standby mode while in 1X mode.
Manual push-button (or, footswitch) mute during forward, Ping-Pong/Random or reverse run operations.
Standard stage advance (SON) or, Start-on Stage (SOS) operation: The sequencer starts on the stage it is set to on the next valid clock cycle without having to preset it to the stage prior to the stage you want it to start on.
Zoned mute for selecting main gate mute while allowing the expansion gate out function. Or, both muted. When a stage is selected for mute via the zoned mute, the previous active stage value is held during the mute. Effectively doubling the note length if longer envelope release values are used.
Footswitch and push button mutes don't hold the previous active stage value. Allowing for a long envelope release to let the sequence fade out while playing the stages.
Features added and included in the Expansion Module, the Stand-alone Module and the Euro module versions:
16 independent stage gate outputs (+5V)
Additional I/O to assist with multiple system expansion.
A foot switch jack that parallels the panel pushbutton or, can be configured with a jumper for use with future features.
MIDI output providing note on/off, note value and octave shifts for recording the programmed events on a MIDI recorder.
User selectable MIDI output channel. Or, MIDI channel sequencing. MIDI can be programmed to output dual channel or dual note.
USB port for updating the software version from the web.
All user-invoked program functions are retained after power off and still active when powered back on.
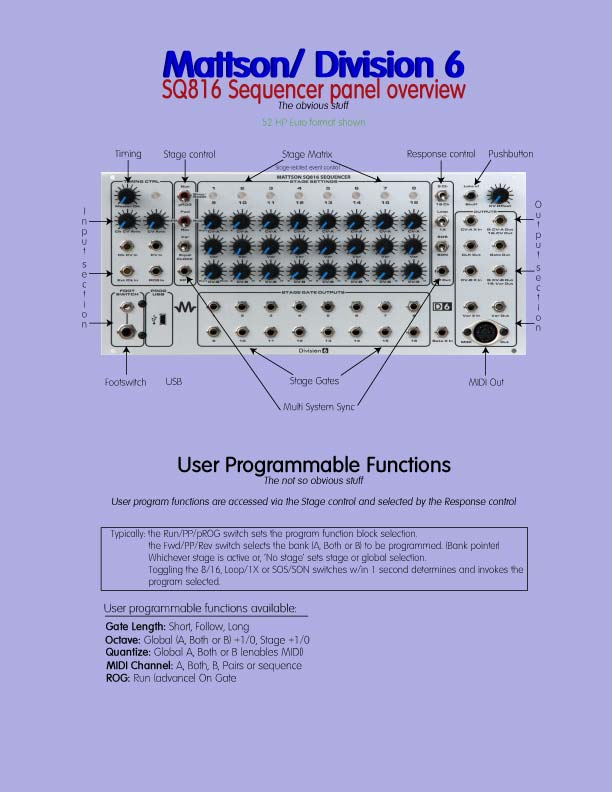
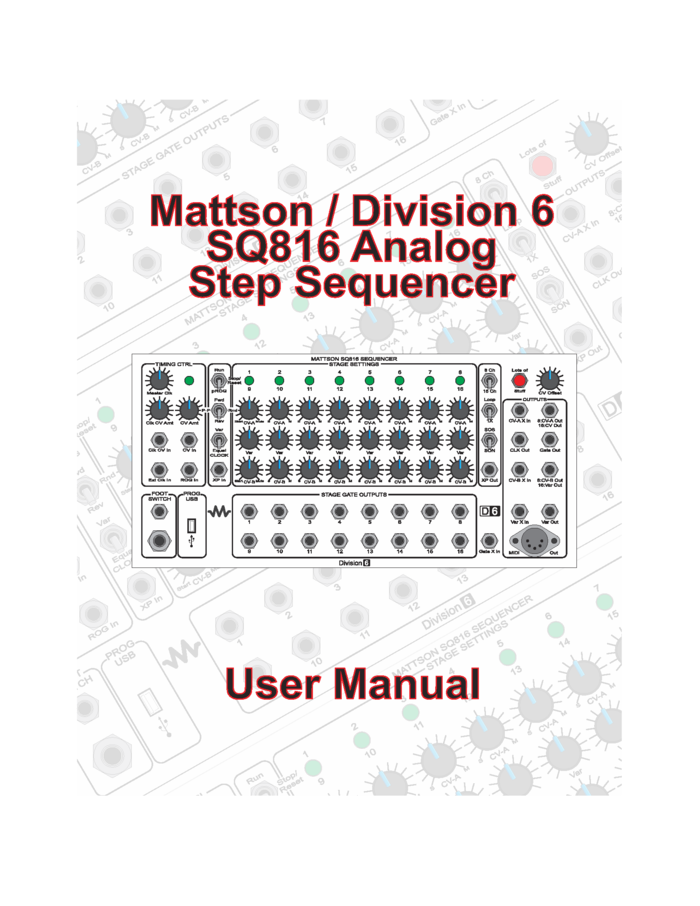
Panel Overview
User Manual
Advisory:PLEASE READ!
When power is applied, The SQ816 will perform a three-color LED scan to check the LEDs.
After the LED Check, it displays a code on the LEDs to indicate the currently installed software version.
When those are complete, the SQ816 will enter Ready (Standby) mode.
This mode is waiting for an input from the user or, another system. The clock LED flashes red at the clock rate indicating that the main gate is muted. No stage LEDs are lit.
There are also no outputs from the CV bank outputs A and B.
To place into active mode, place the mode switch to the Stop position and push the push button. This will set the beginning stage and put the SQ816 into Active mode. The clock LED will flash green. (Yellow if in tap-temo mode. Or, red if the active stage is in the mute position.)
Place the Mode switch into the Run position to allow the stages to advance at the set clock rate.
See page 4 of the User Manual.
And, watch the startup video:
Availability
This module is available. Shipping to direct orders and dealers is underway.
3X wide Main Sequencer Module: $730.00
2X wide Expansion Module: $240.00
Stand-Alone version with case and power entry: $1,054.00
Note: Email about custom case options to provide custom length Euro skiffs for customers wishing to consolidate some of their existing modules with the SQ816.
Division 6, 52HP Euro format version: $970
Combines both: the main SQ816 sequencer and the SQ816 Exp expansion module into one, 52 HP module.
Specifications:
MMM SQ816 module current:
I+ = 74 mA
I- = 31 mA
MMM SQ816EX Expansion module current:
I+ = 12 mA
I- = 1 mA
Division 6 52HP Eurorack module:
I+ = 86 mA
I- = 32 mA
Firmware:
Previous Software version release: V-1.0.1 (Download firmware updater)
Current Software version release: V-1.0.2 (Download firmware updater)
Changelog:
- Changed the way you enter USB programming mode. Set Run/Stop/pROG switch to pROG, hold down button, connect USB cable, relase button.
Updated 06-23-2015

